
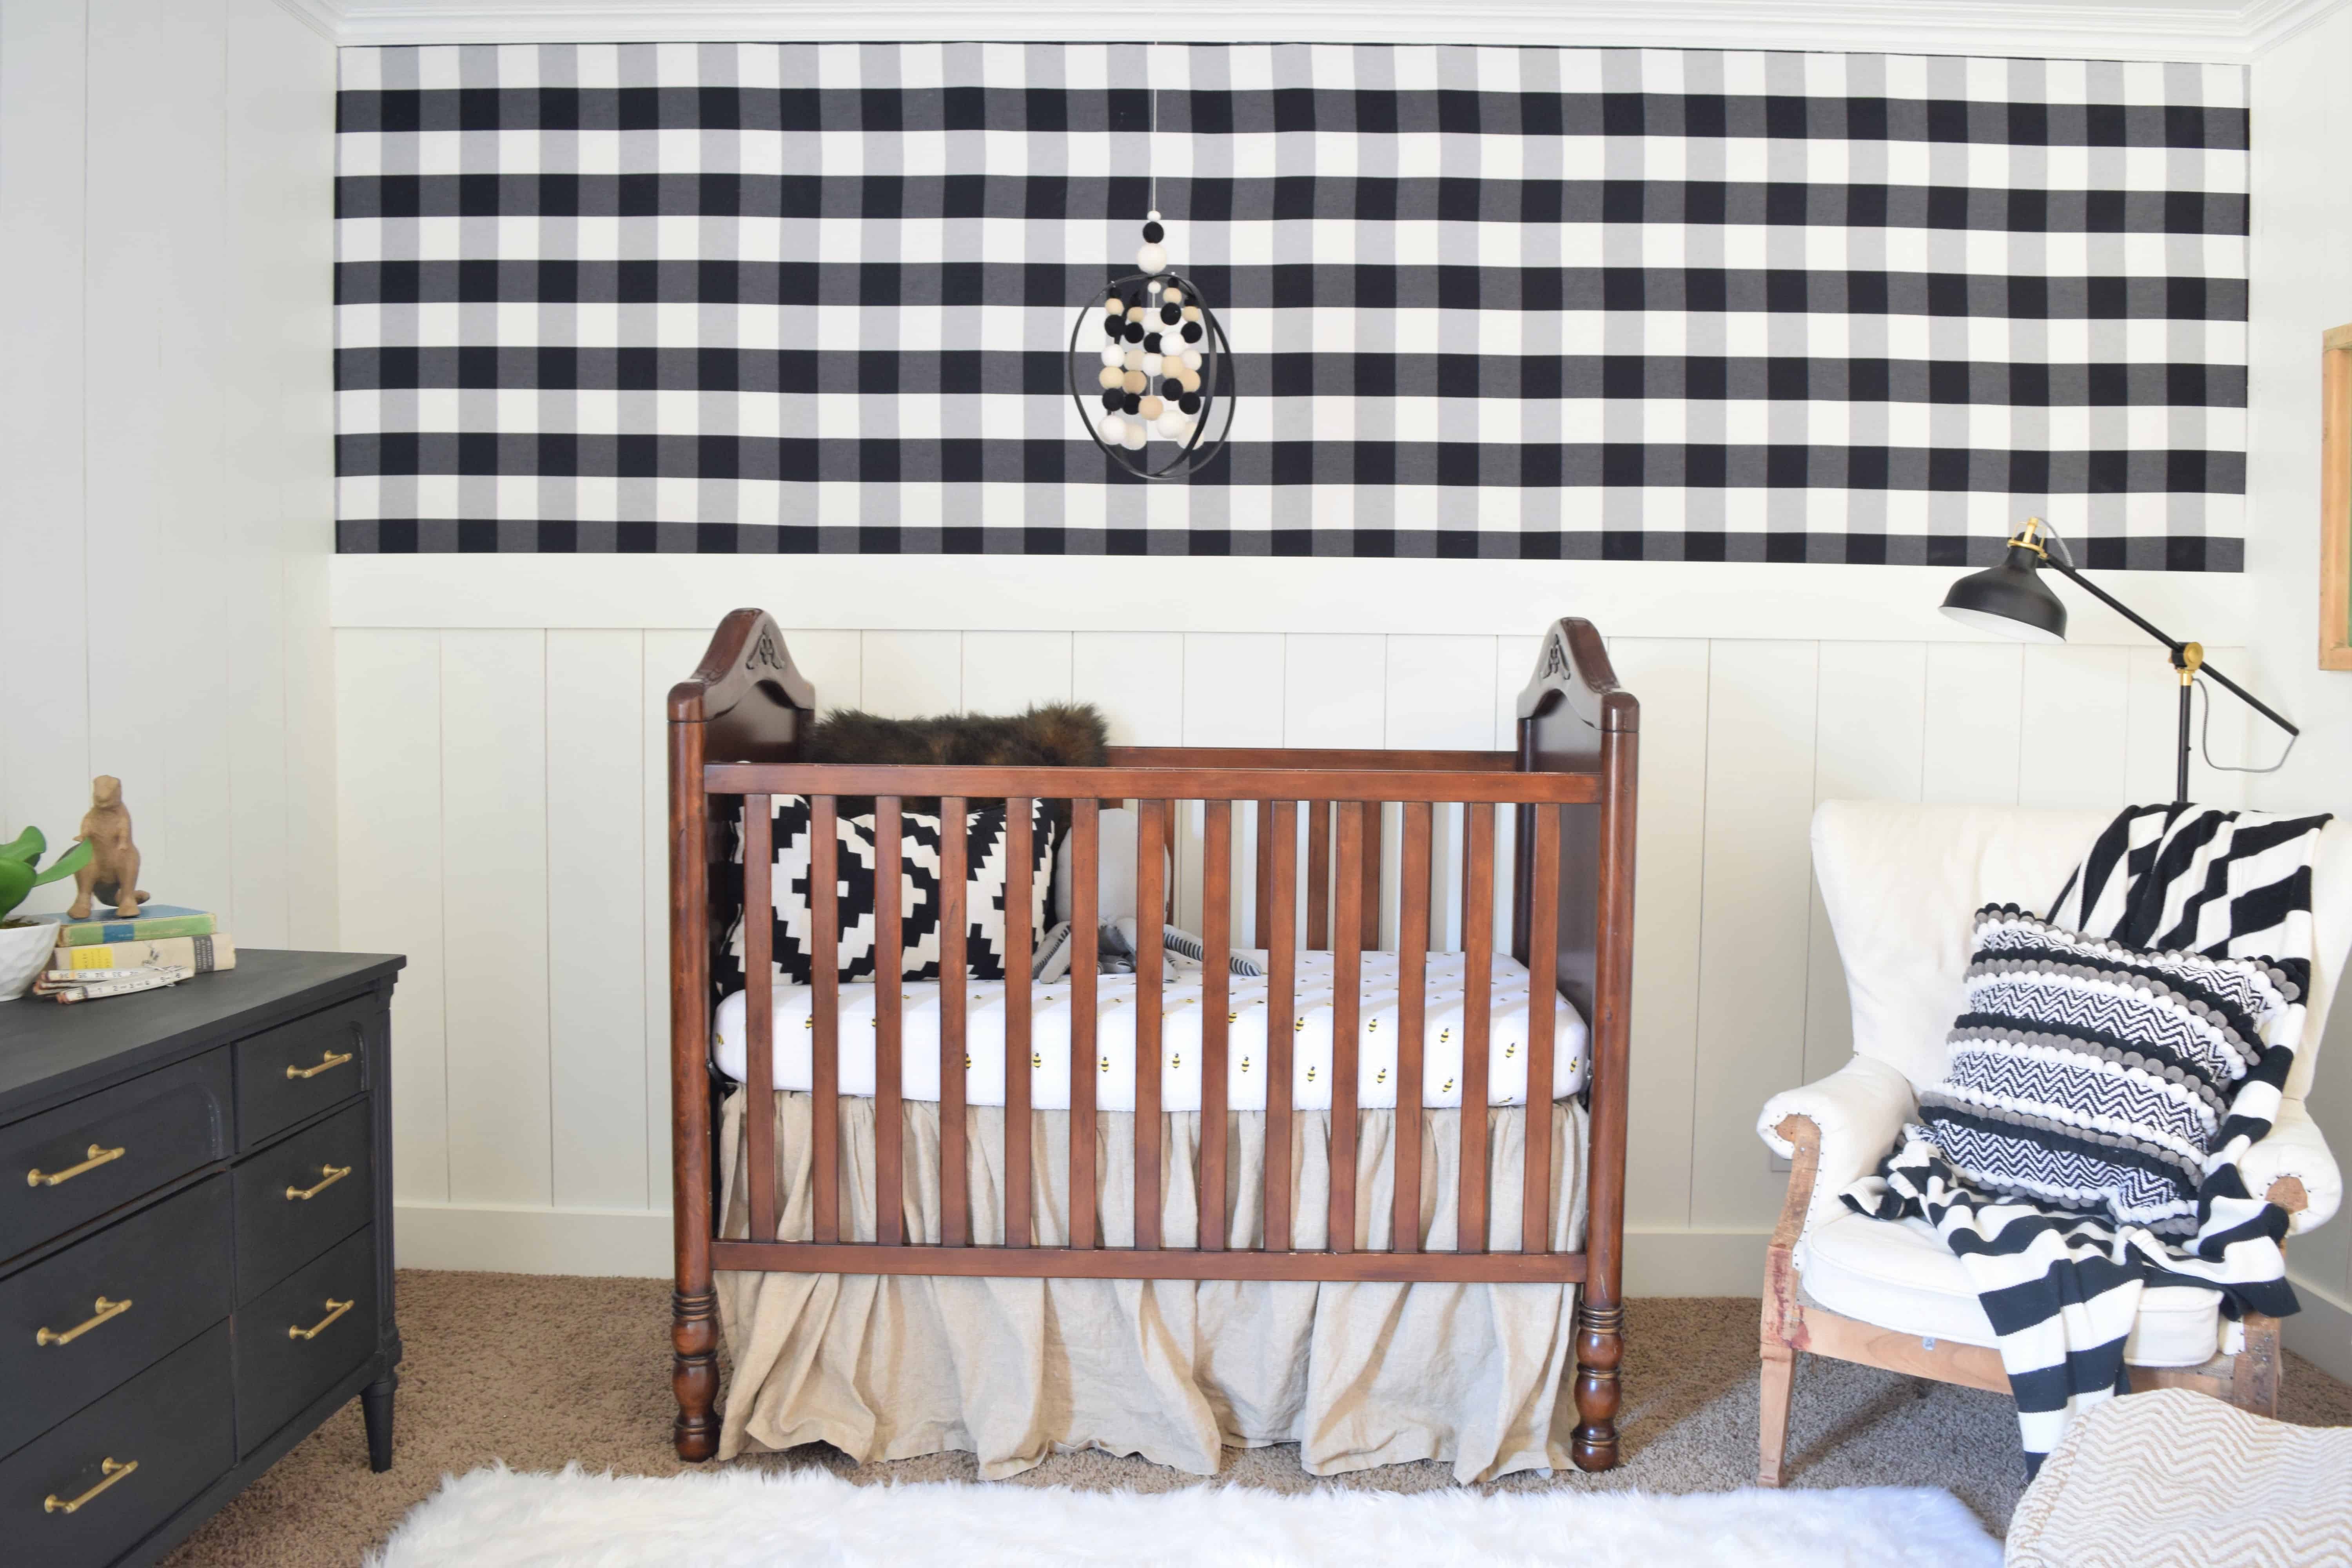
I am loving the wallpaper trend going on out there! The only thing I do not love about the trend is the price tag that follows those beautiful patterned walls. When I was designing Ridge's nursery, I knew I wanted to incorporate some black and white buffalo check. I found some wallpaper that I LOVED, but it was pricey and I wasn't sure how permanent I wanted it to be. Then I remembered that IKEA sold a really cute, large scale buffalo check fabric. I began researching how to make it stick to my walls and found some great options!
Materials:
Fabric of your choice
Liquid starch
Thumb tacks and painters tape
Paint roller and tray
Small sponge brush
X-acto knife
- Measure the area you want to cover and add 6 or so inches to each side to allow for shrinkage. Add more if you plan on pre-washing your fabric. I didn't pre-wash because i'm a lazy DIY'er.
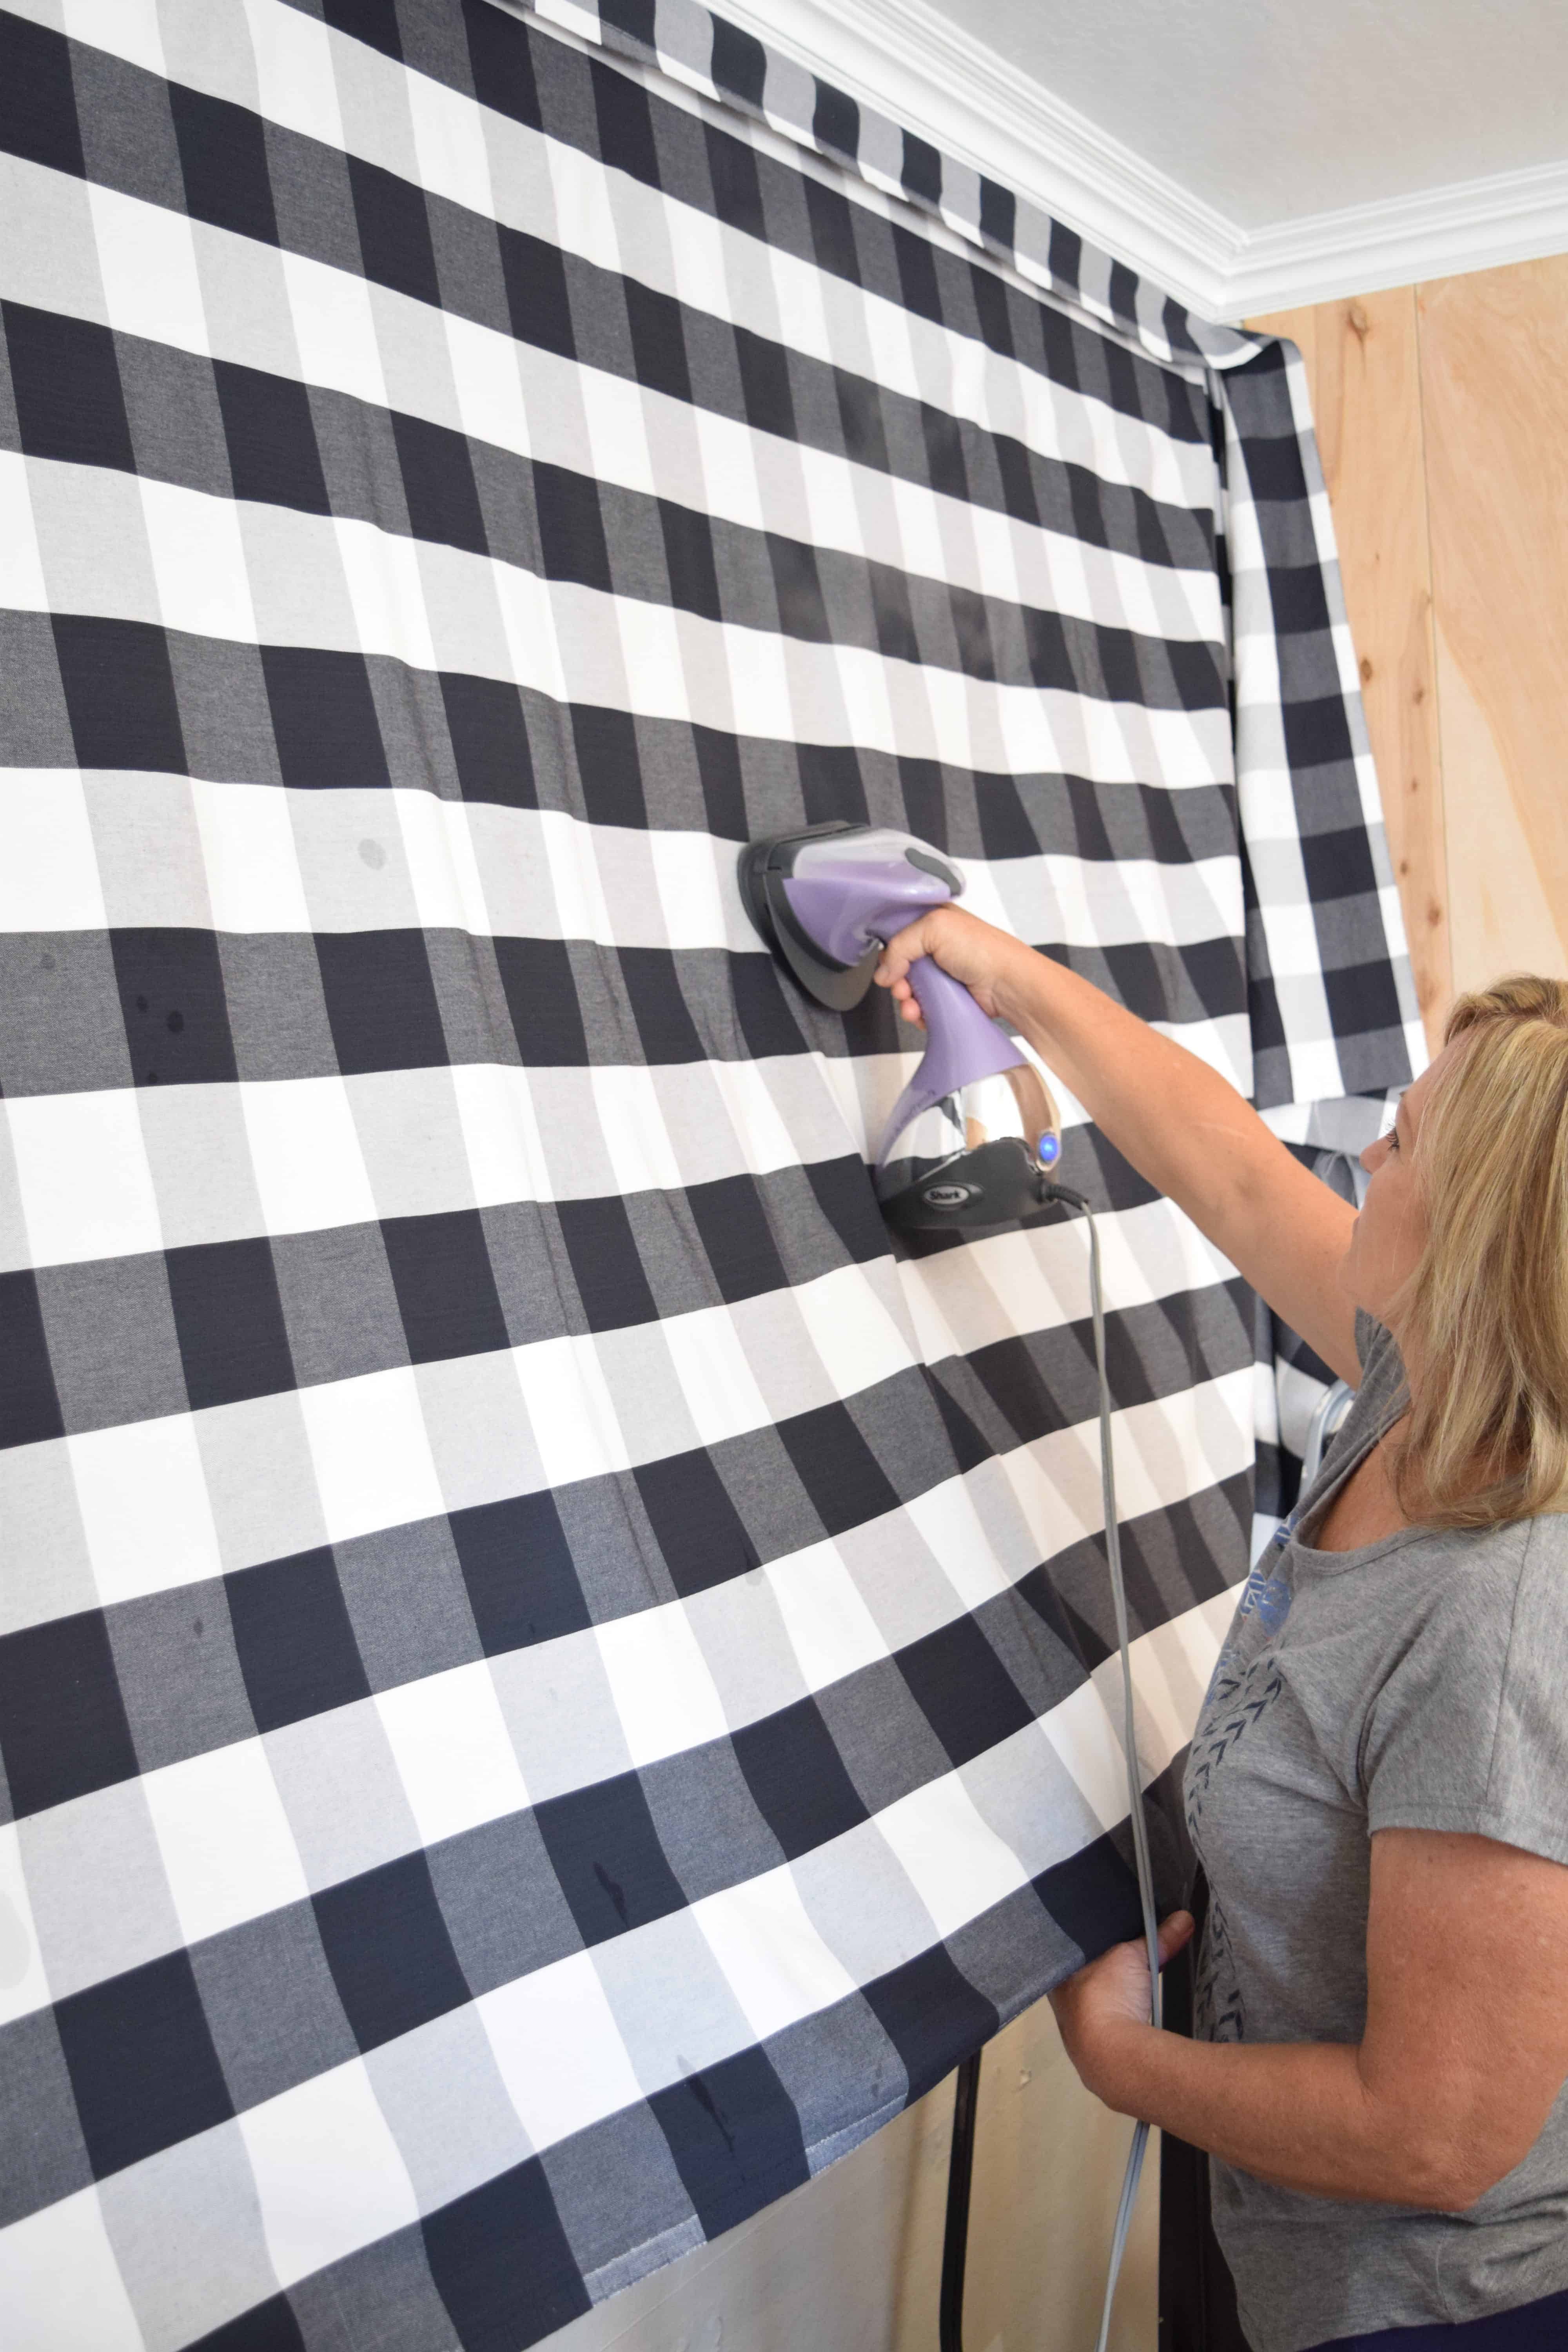
- Steam or iron your fabric to get all the wrinkles out. I also didn't do this at first and ended up having to steam part of it while the other part was stuck on the wall. FUN times haha!
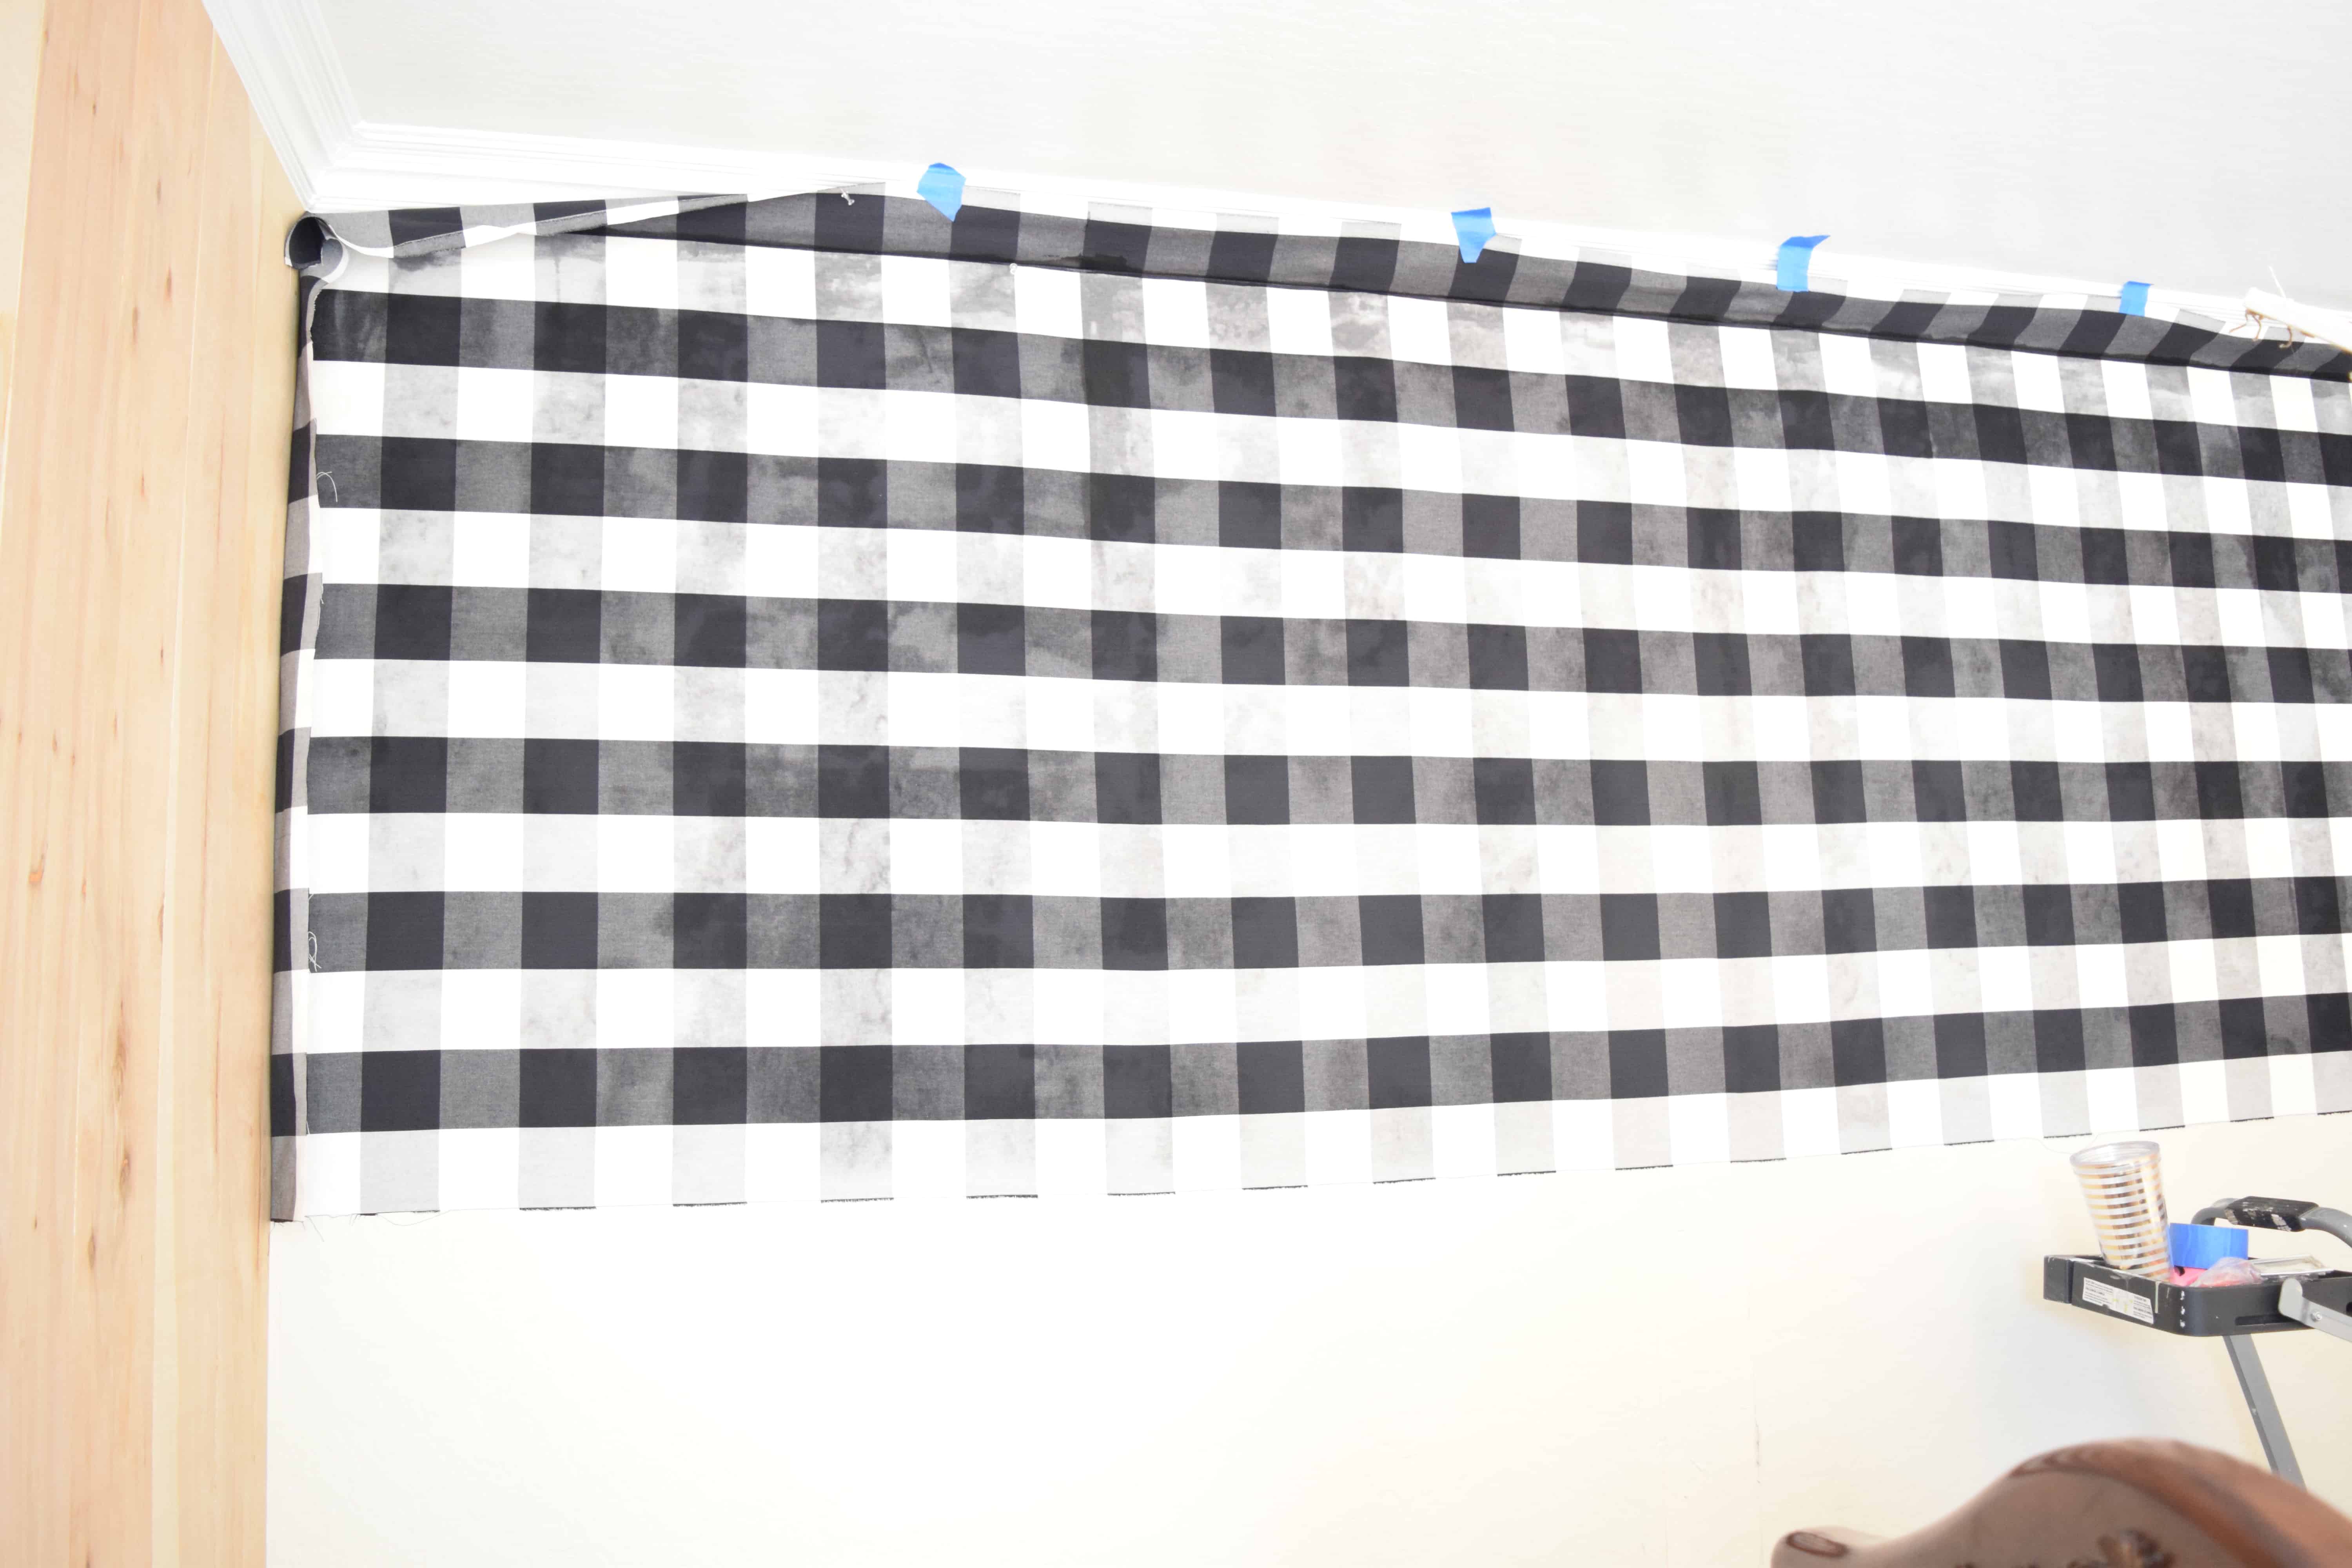
- I started by using thumbtacks and tape to secure my fabric to the top of the wall
- Starting at the top corner I rolled some liquid starch on the wall then smoothed my fabric on top of it. Work in small areas because the starch dries fast!
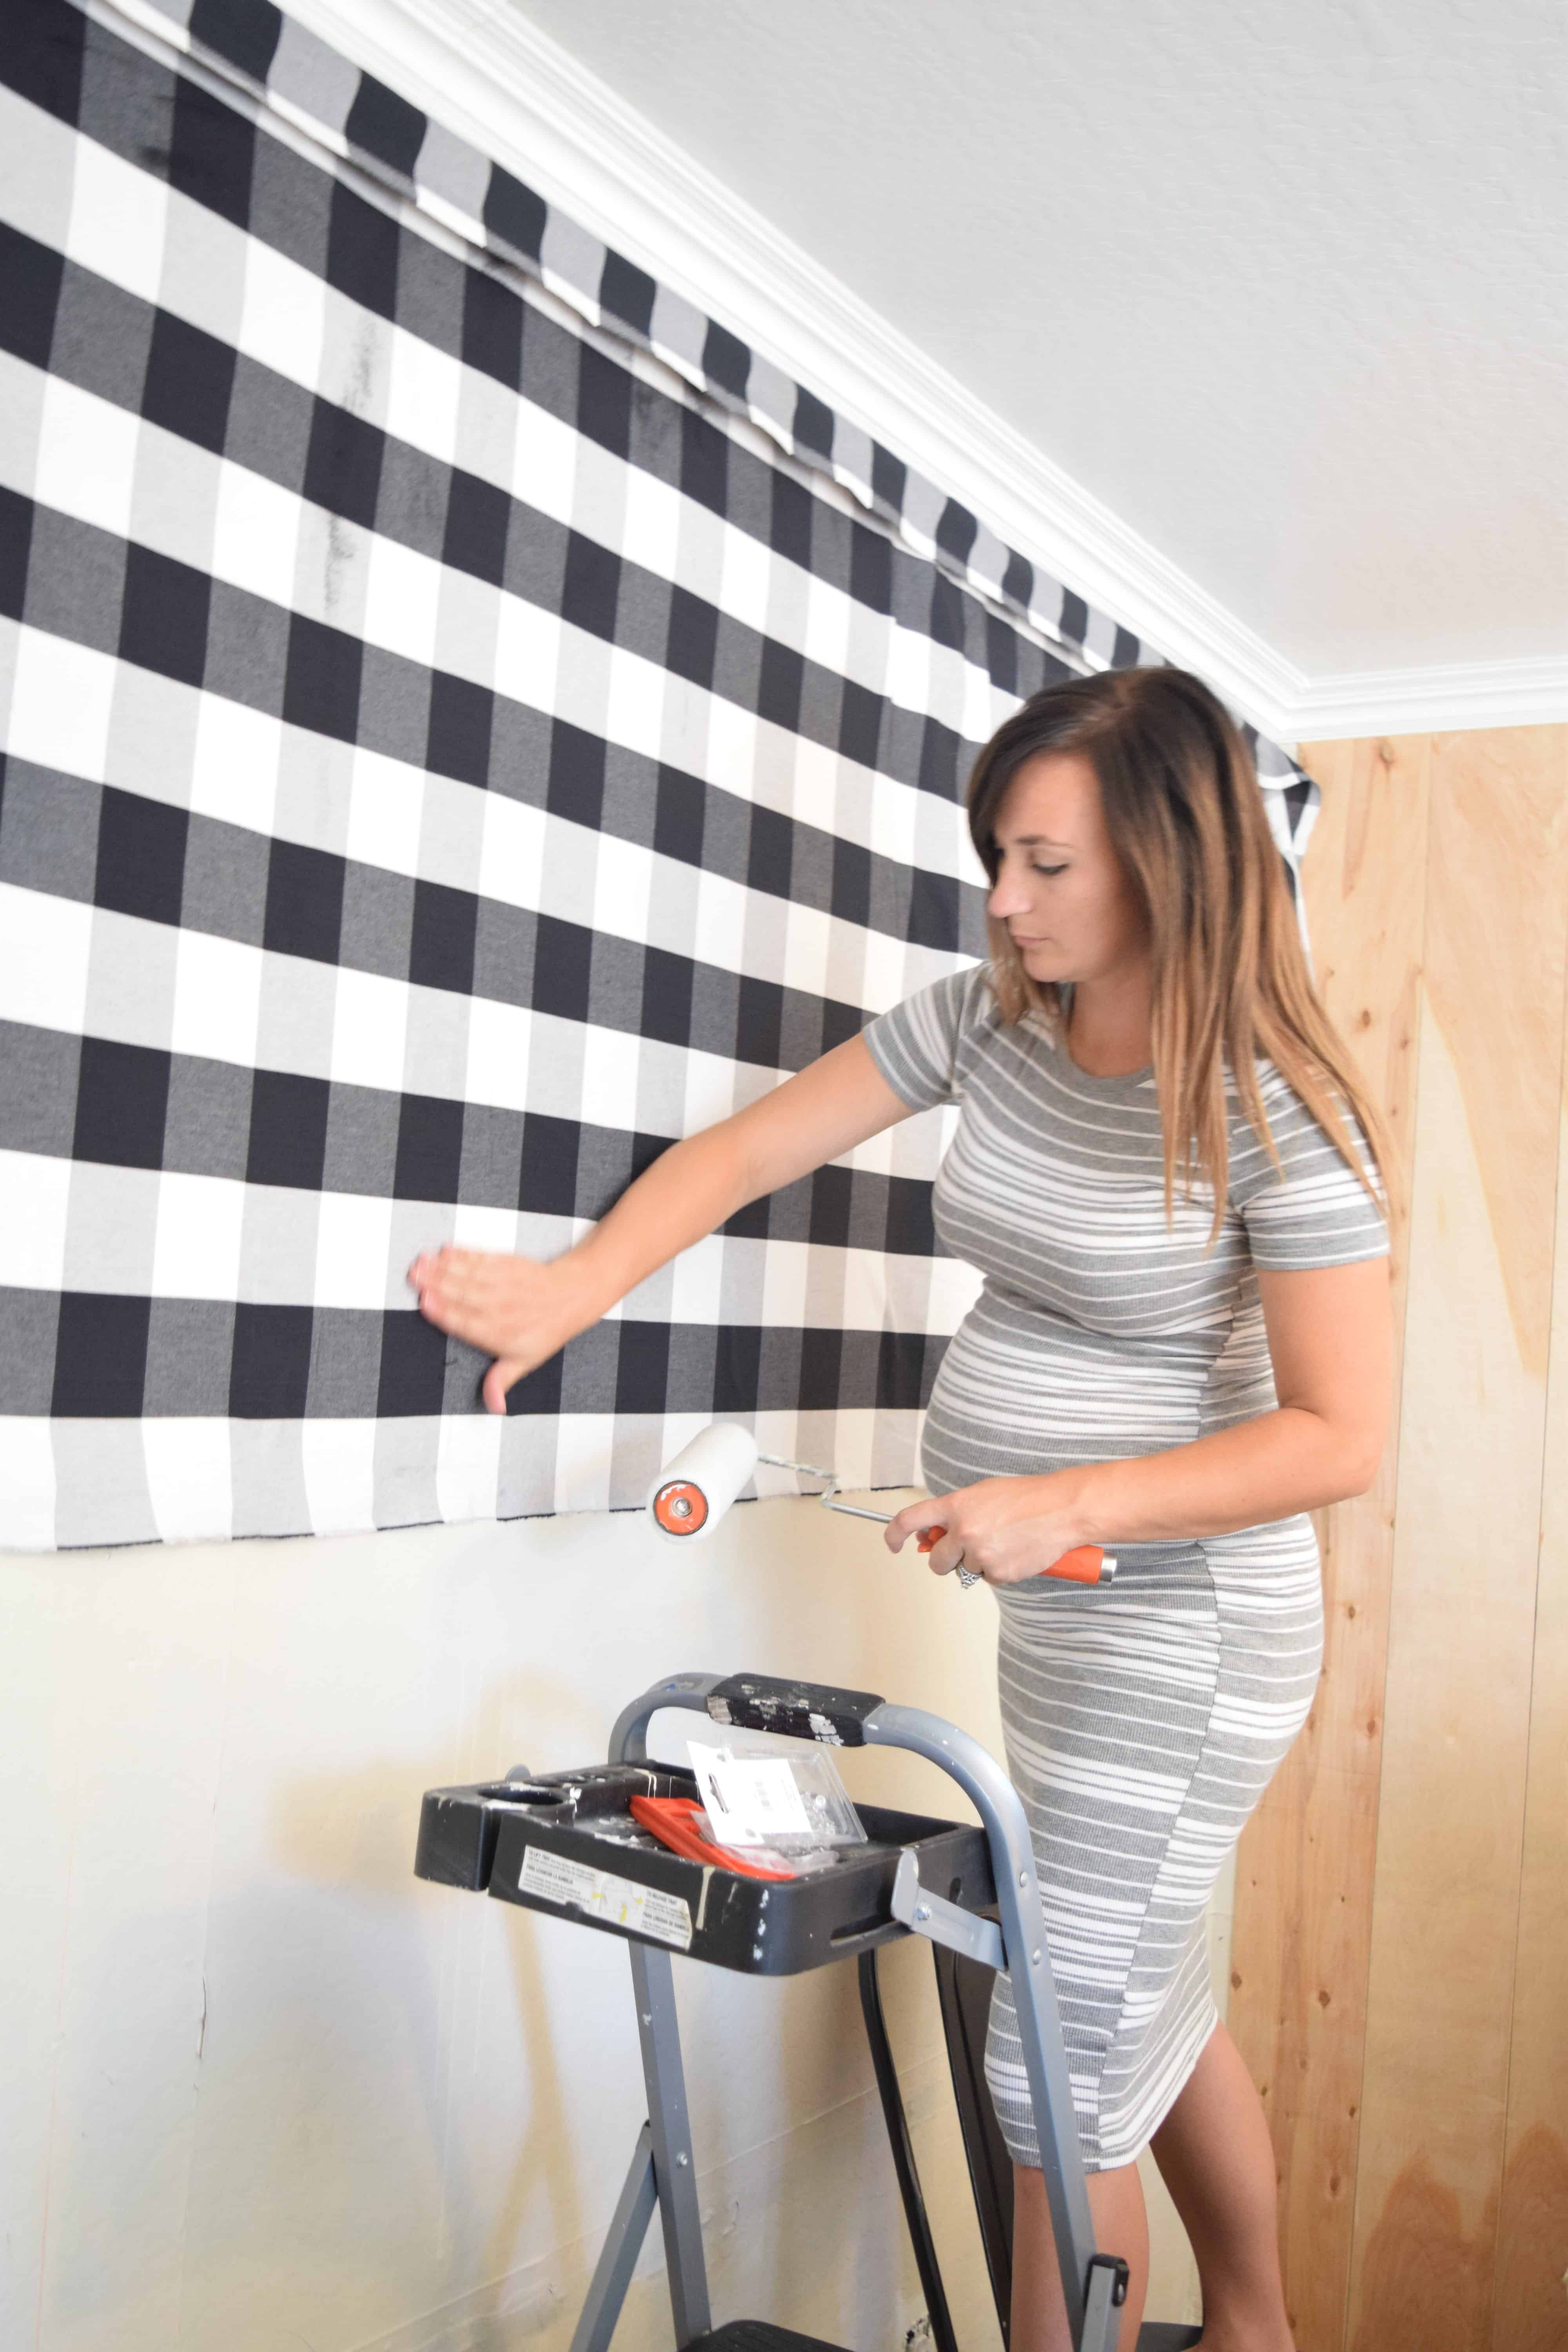
- Then roll the liquid starch on top of the fabric. You want to make sure it is completely saturated.
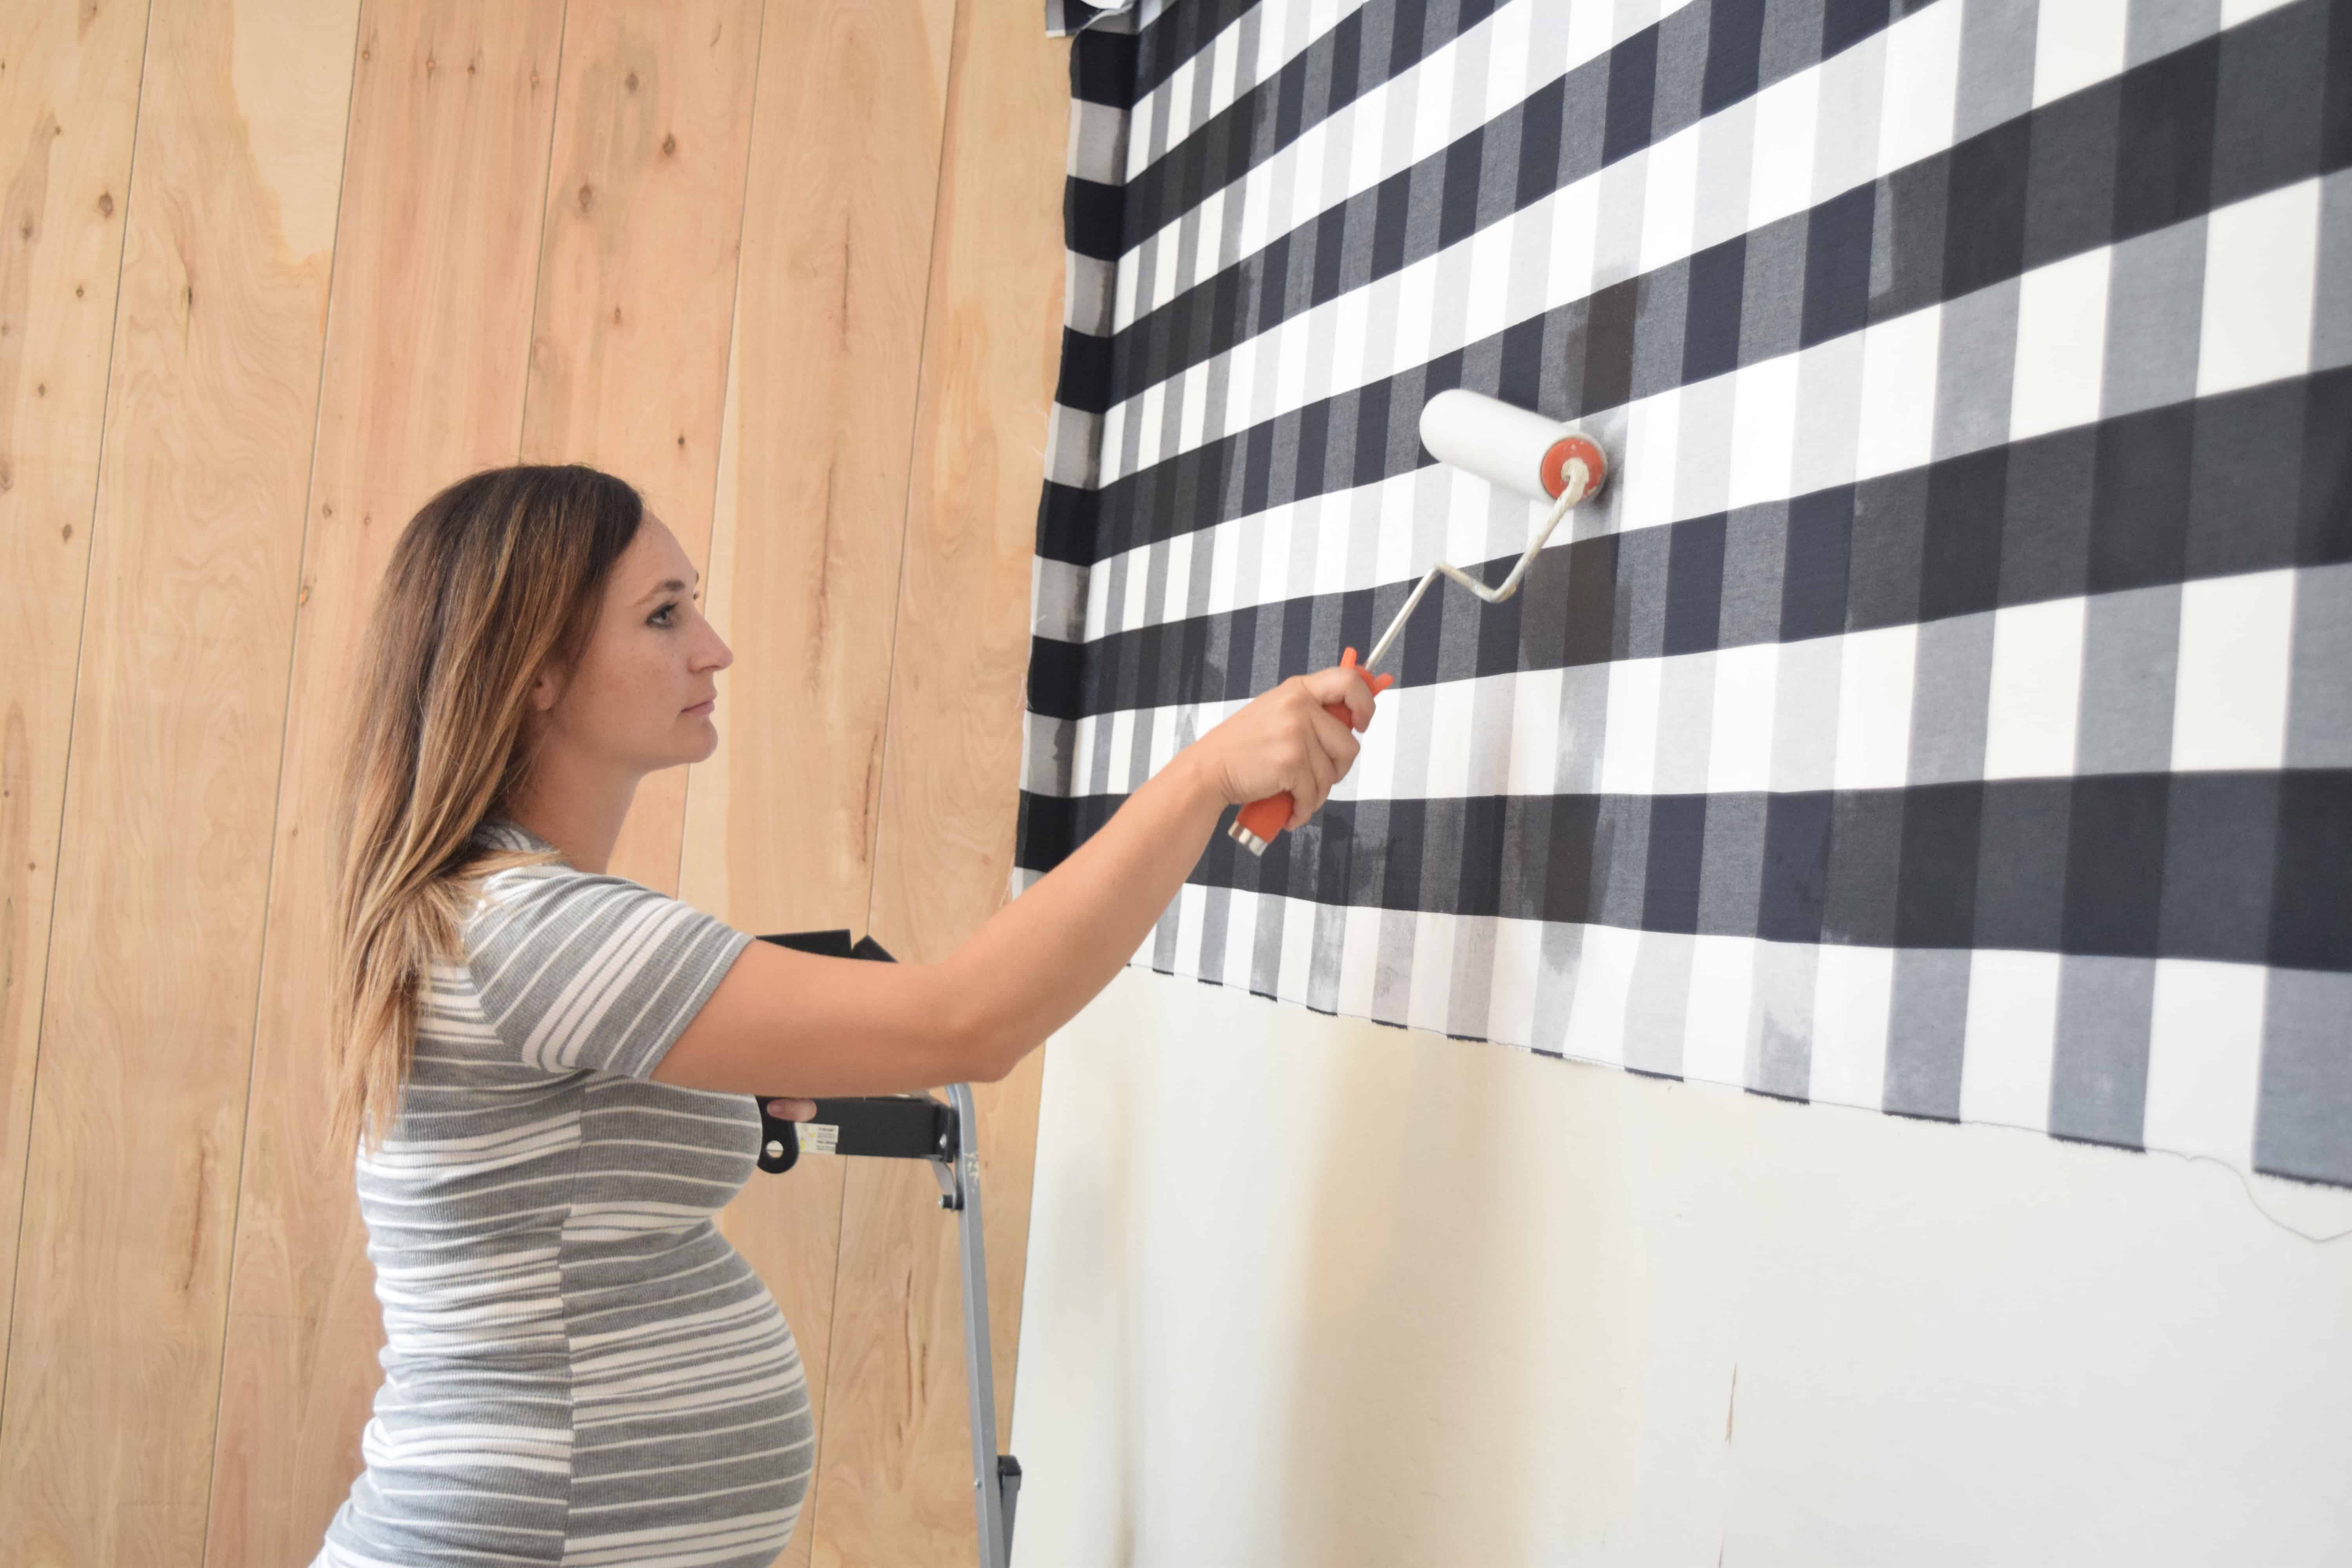
- Continue doing this along the whole wall working in 1-2 foot increments. Be careful not to pull the fabric too taught. I used a small sponge brush along the edges to make sure they were very saturated and I used pins every foot or so to really secure it while it dried.
- Allow to dry completely. At this point I taped all the excess back to the wall. It will look splotchy until it dries.
- Use an x-acto knife to trim off the excess
My awesome mom was kind enough to help me with this project. She always seems to get roped into my nesting projects, sorry mom! She is seriously the best though. I think this could be done by yourself, but an extra set of hands is very helpful if you have them!
I haven't tried removing my fabric yet, but from what I've read it comes off easily with just water! I love how it turned out and love that its something i can easily change if i want to!
And if ever I consider changing it, I'm sure it'll be when I'm in the mood to change up other things around the house too. I'll probably just look for a skip bin online and hire one to take away the things I won't need anymore. Now that I've got the hang of this DIY project, I'm sure I'll be trying some more soon!
This is a fairly easy project that can give you the look of wallpaper without the removal hassle. My favorite bonus is it can be done on a very tight budget if you can find fabric you love inexpensively!
(Side note: I thought about editing out the lovely bite marks on my crib but decided not to because that's life. My THREE amazing, sweet, precious boys have slept in this crib and the imperfections each of them has added over time reminds me of how fast time flies by and how important is it to cherish each day. Life is messy, dirty and imperfect just like my furniture, and I wouldn't have it any other way!! Sentimental rant over...) 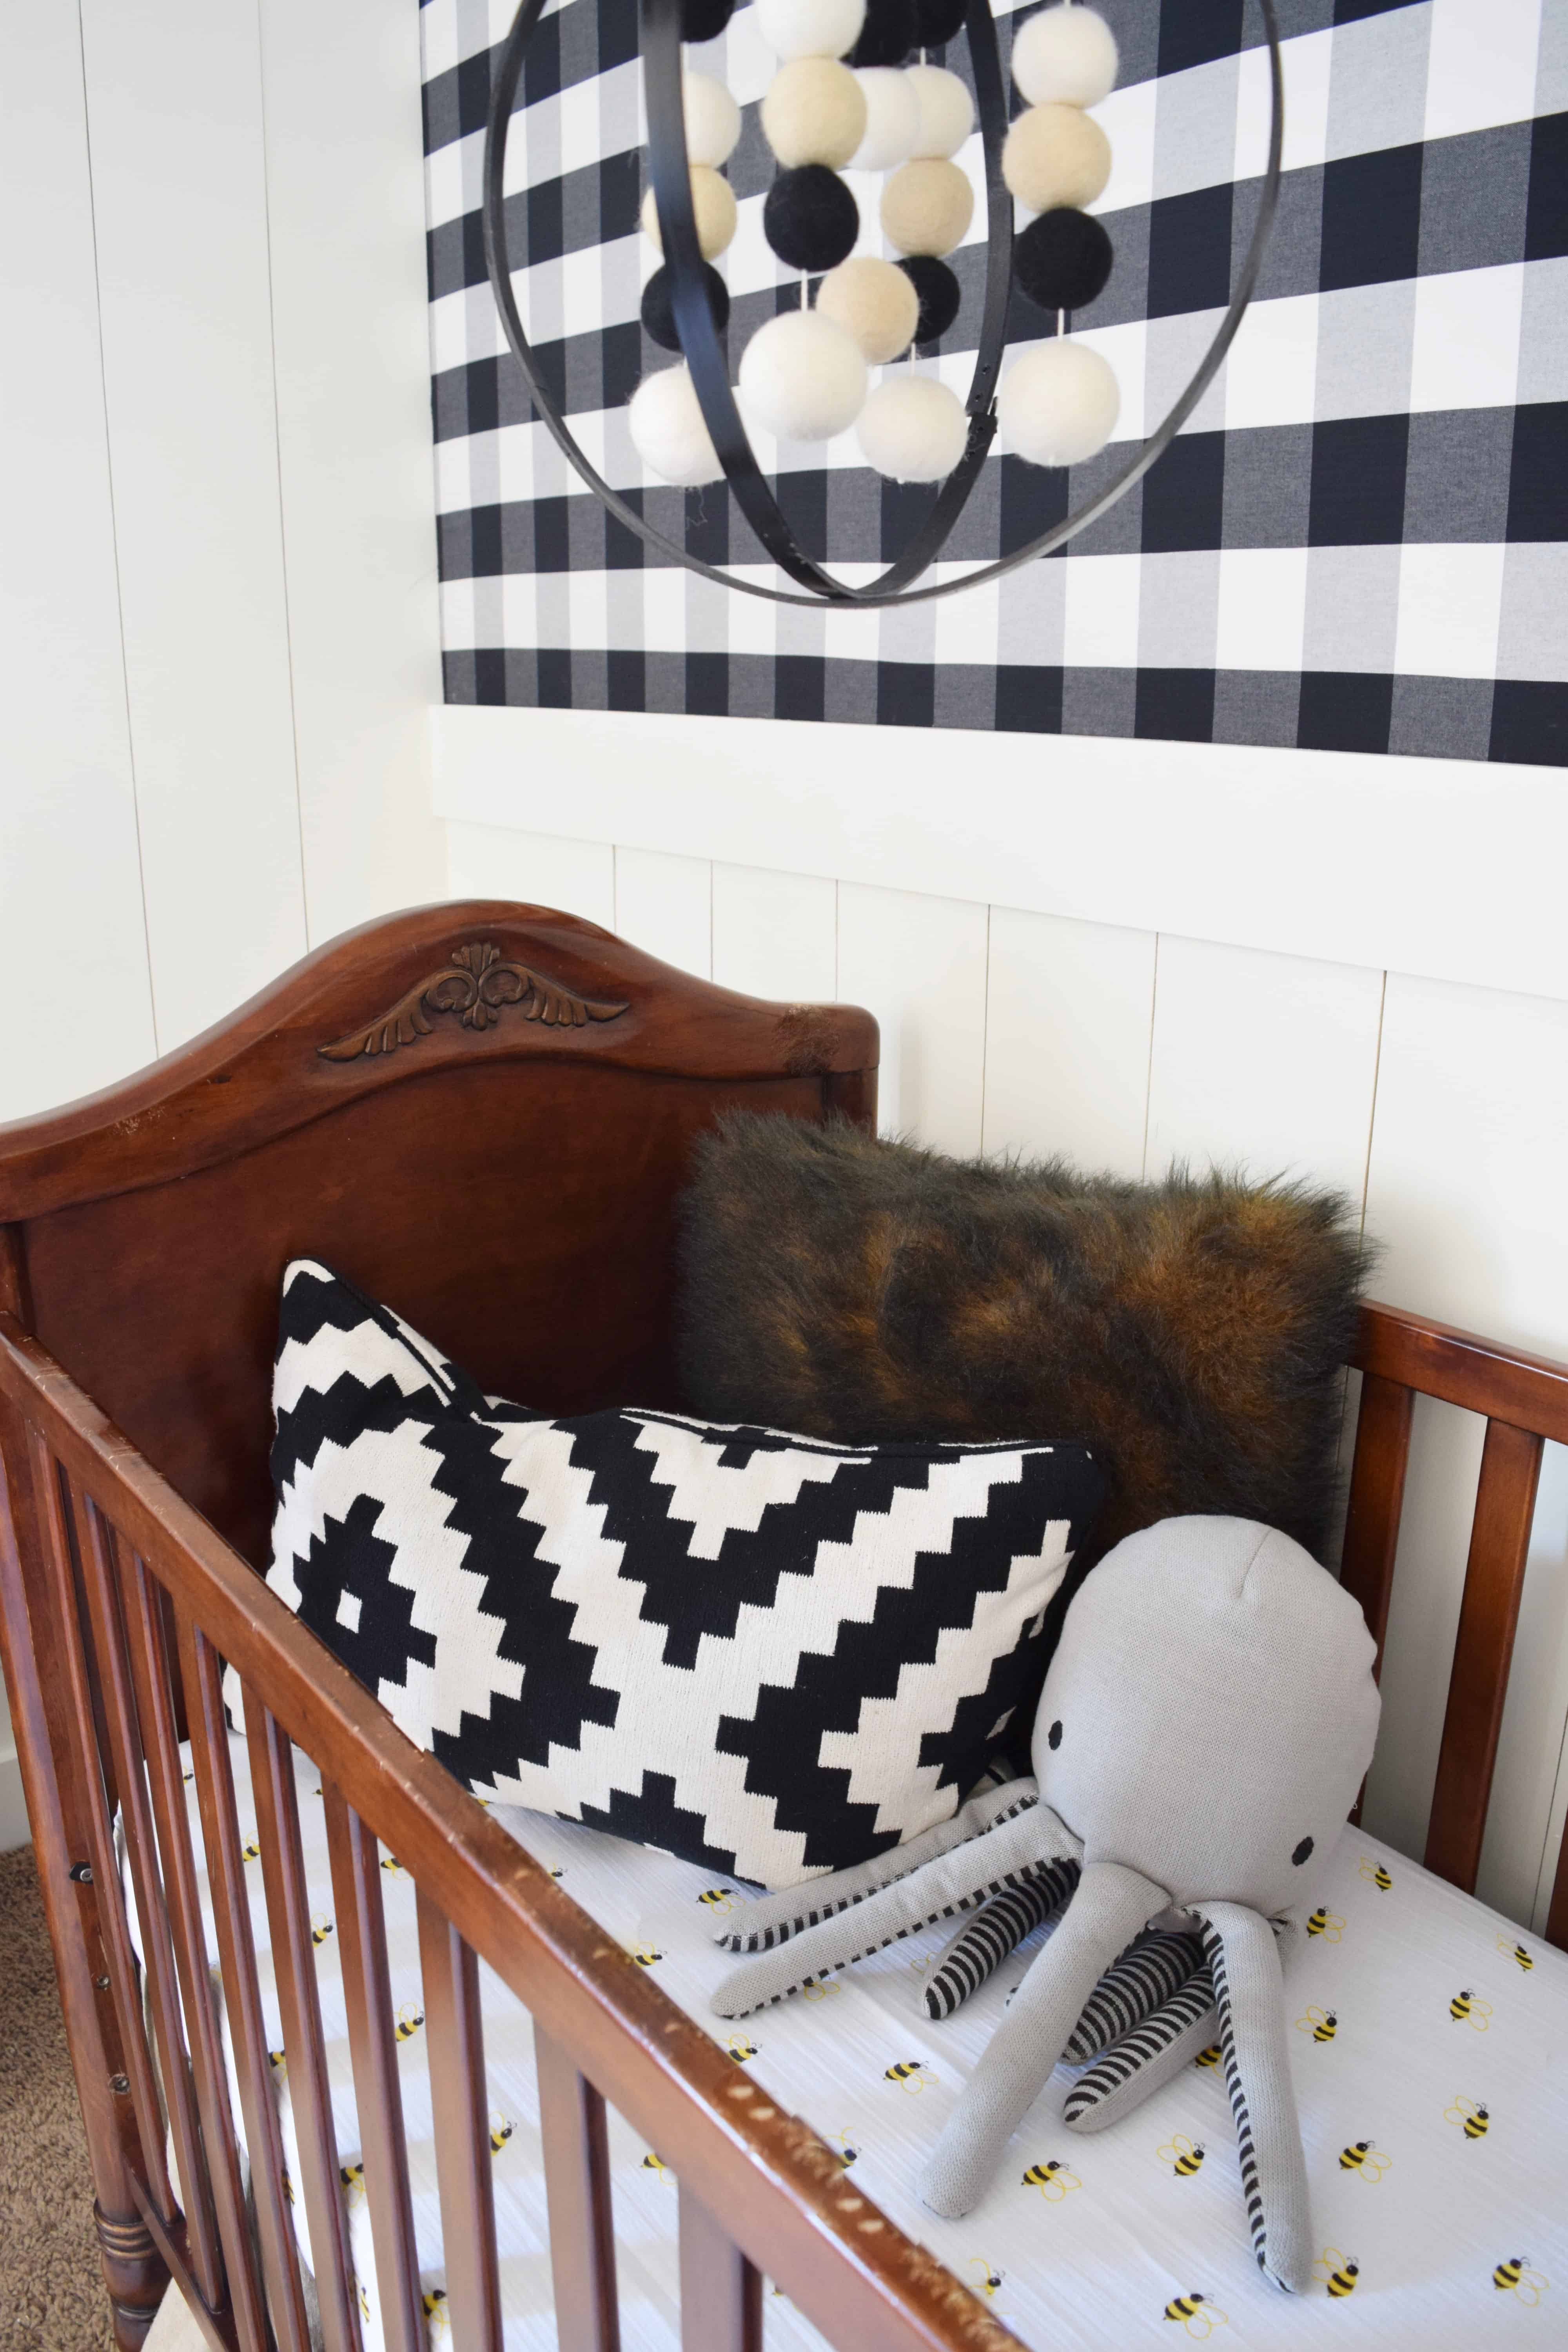
Leave a Reply