


I have a real good before and after to share with you all today along with a fun video tutorial (my increasing fav.)
This is a story all about my friend Ashley. Her and her husband purchased a dated ranch home in their dream location last year and has been slowly bringing it into this decade. This house has great bones and SO much potential, but it's been a slow process of choosing fresh but timeless updates on a budget. She has a small full bath that was so dang dated and sad and yellow. She was always looking at Anzzi Sinks and glass shower doors but as this room was still fully functioning, and there were other parts of the house that needed attention sooner, the dull yellow room was ignored. Last fall we found a vanity on deep discount at Lowe's which fueled this renovation. She brought home the vanity, tore out her existing floor, had it installed rather quickly. She also made sure that she had all the technical bits fixed too like her drain and sewer systems (go to website for one company that provides this service) and also, had all the electrics fitted. In addition, it was important that during the bathroom remodel we had a reliable plumbing service to make sure that all the fixtures were working well (click here for one service). Buuuuuuuttttttt, ever since has been living with bare concrete subfloor. We've all been there in a renovation right?
This is what it looked like before so maybe you can see why she was itching to change it ASAP.

After we had the vanity, we found some wallpaper that we loved. It is peel and stick and very easy to install, though in the bathroom with a shower it hasn't lasted the best. We wondered how it would hold up to the steam, the answer is not great... so though it is pretty I wouldn't recommend it for a bathroom application. Much like how you want to get drain cleaning done by the professionals (like paultheplumbernh.com/nashua/plumbing/drain-cleaning/, for instance), you want to get the proper materials for the area.
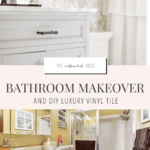
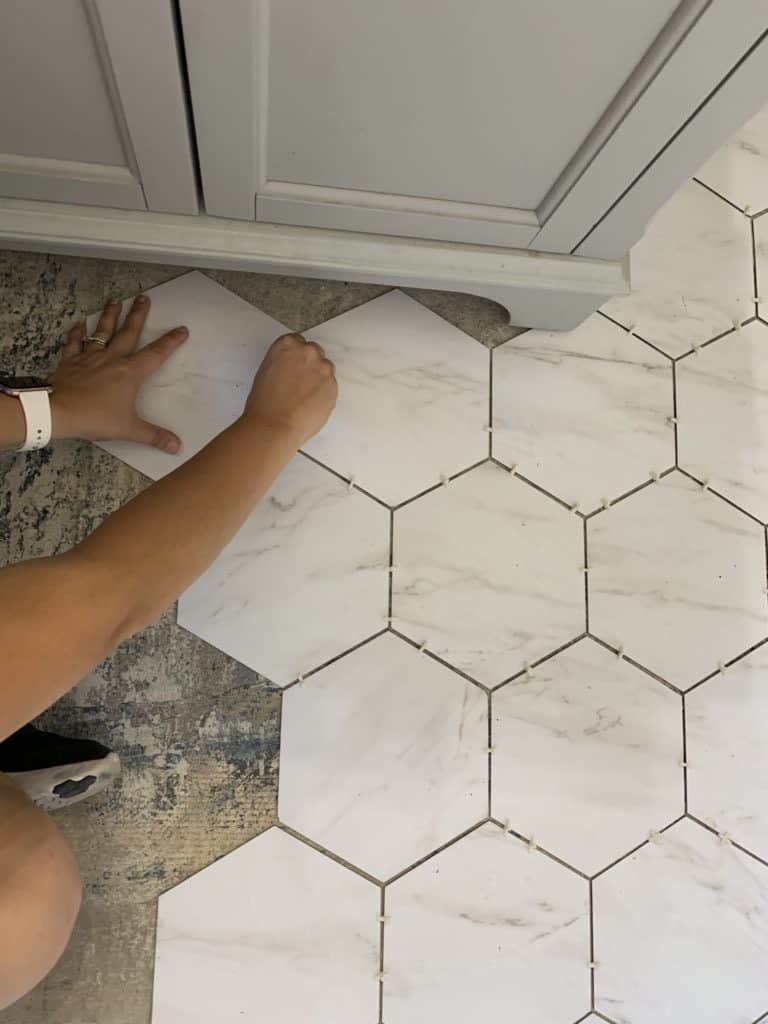
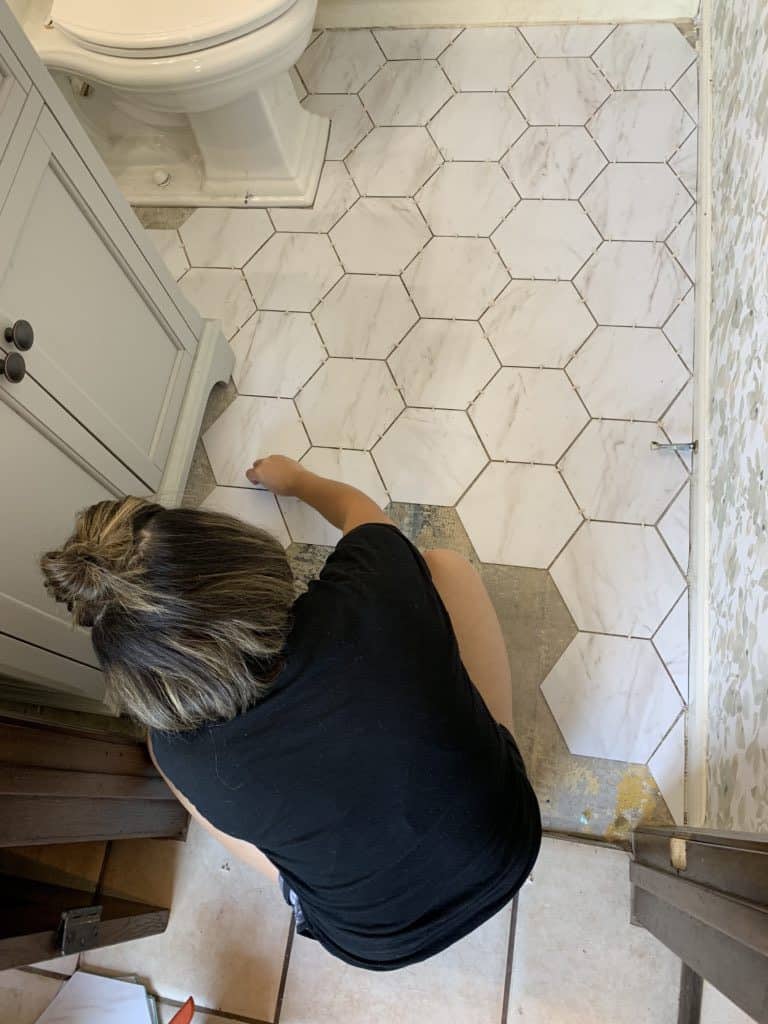
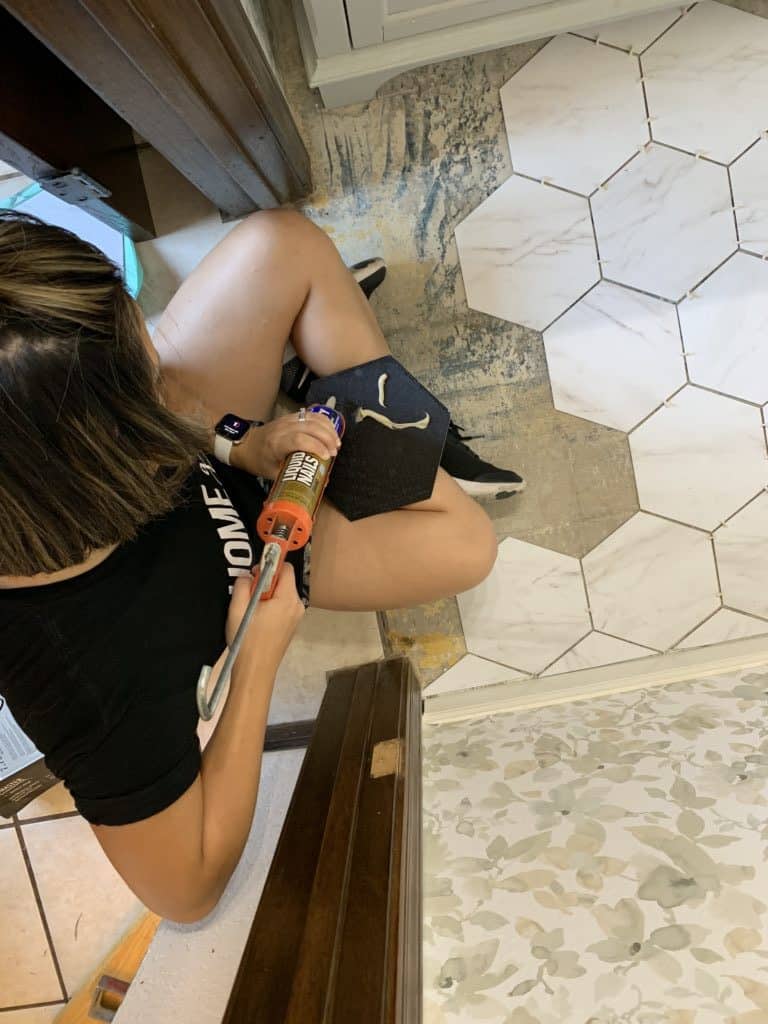
Ashley was a little stumped at what flooring to use, I kept nudging her to use this really cool Vinyl Hex tile that I ran across one day at Lowe's. When she was finally ready to take the plunge, I happily volunteered to come assist because... who doesn't love a good DIY project in the middle of July, in Arizona, when it's 110+ outside.
Products we used:
Project notes:
- Though this product is peel and stick, you need to use liquid nails to adhere it to the ground. Some tiles that we did not apply enough liquid nails to didn't adhere well enough and we had to lift them and reapply them with a generous helping of glue.
- The grout lines were a little tricky to keep uniform, even with the use of spacers because without thin set to help even out an imperfect subfloor it was futile. We did the best we could and accepted it wouldn't be completely perfect.
- After we allowed the tiles to sit for about 20 hours we noticed that some had cupped in the middle. We used heavy objects in the center of them to help get rid of the cupping and it worked really well.
- Do not allow the grout to dry before using a damp sponge to clean off your excess, it gets very difficult to remove. Work in small sections when applying your grout.
This bathroom is in a narrow hallway so it took some major contortion skills to get some good photos for you. It really is so great. I can't believe the transformation.
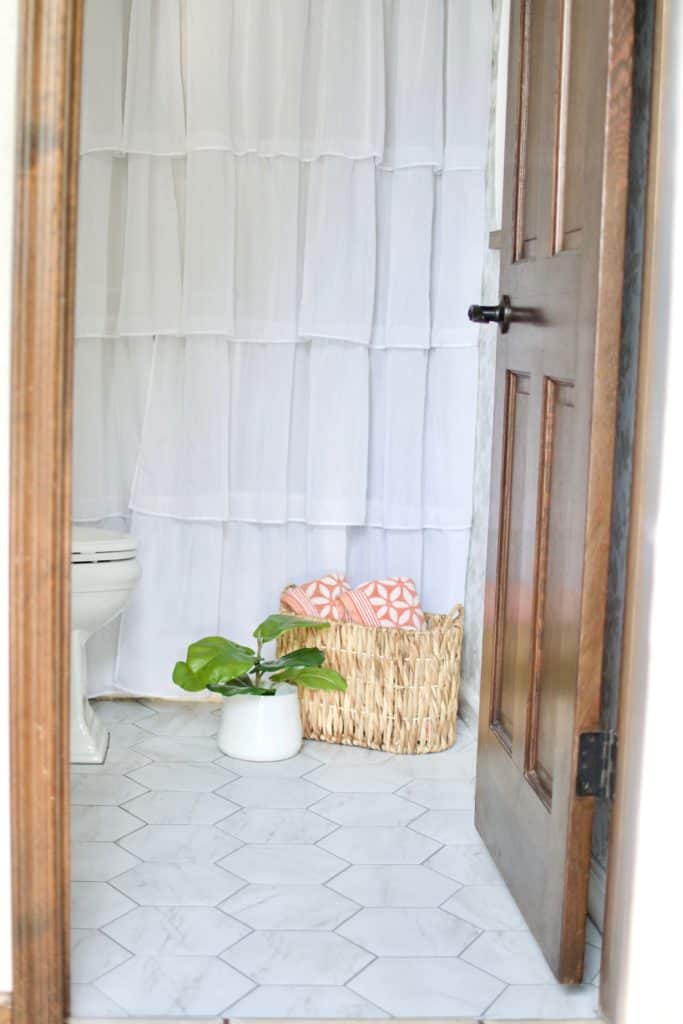
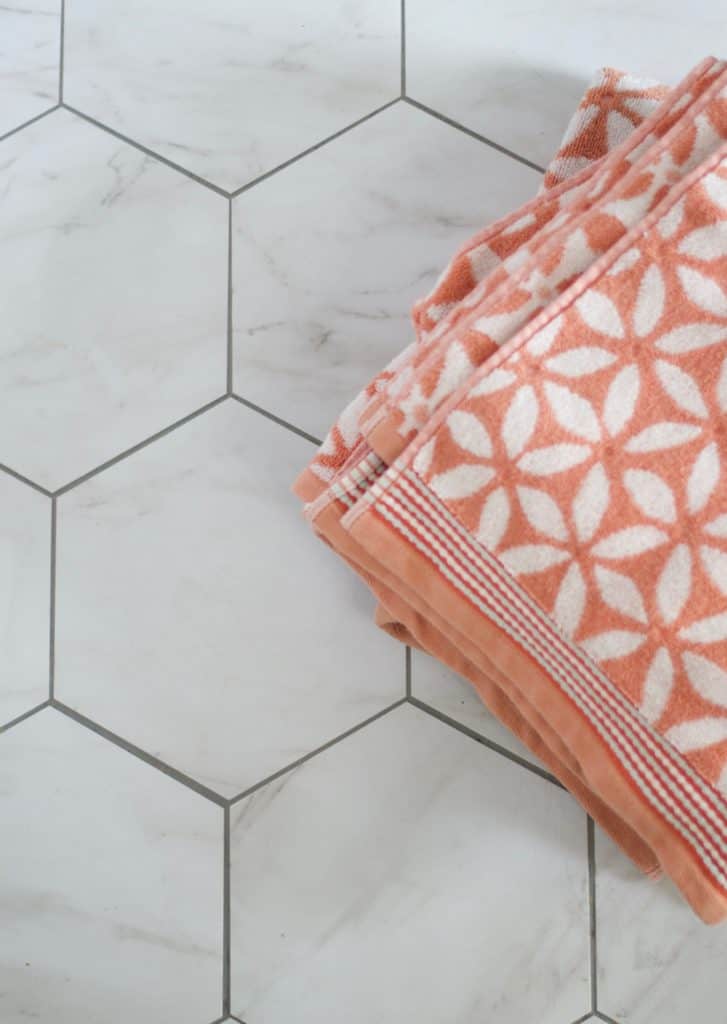
What do you think? Can you believe that this ended up costing a little more than $1 a square foot and is VINYL. In person it really is so beautiful, and I really don't think you can tell until you feel it with bare feet that it isn't actually stone. Such a fun little makeover that was actually months in the making all wrapping up with a surprisingly easy and inexpensive floor choice!
Save this post for later.
Jackie says
Thanks so much for sharing your tiling tips! We are having some water damage restoration done in our bathroom & I want to make a few design changes with our tile when we do! Totally using this as inspo!