I am so excited to share with you my secrets to creating character in our builder grade home. I’ve shared how I love all the millwork, but I wanted to focus on how we built up the frame of my Kitchen Window to give it character with DIY Craftsman style trim. This project all started because I wanted a beefier windowsill above my sink, and I wanted something prettier to look at while I did dishes. Now I’m addicted and I’ve added this style framing every change I get in every room in our home.
It is also important to note here that we got our HVAC system tuned-up by a company similar to Castle Home Comfort Heating & Cooling provides HVAC services in Farmer City and had all our electric and plumbing checked over before the renovation. However, that was not just it! We also had plans of getting our roof inspected and repaired in case of leakage. Just imagine getting this pretty kitchen up and running only to find after a few days that it would slowly be destroyed by the dripping water from the roof. I really did not want this to happen, which is why we considered getting in touch with a handyman from a firm similar to A to Z Construction. After all, my kitchen, an extremely holy space, deserves all the love in the world.
What is Craftsman Style Trim?
Basically its the perfect marriage of craftsmanship + style. This is a classic design element used to add interest and style to doors, windows, posts, and archways by using straight lines and stacking materials. Generally, this style focuses on revamping the existing look of various architectural parts of a home. For example, if your casement windows are outdated, you can replace them with stylish Sash Windows to improve the design of your home. In a similar fashion, small tweaks and replacements can improve the design of the home.
Is it hard to do add Craftsman trim?
No, it really is so simple. My husband and I were knee deep in Kitchen renovation a couple years ago, when I mentioned I wanted to trim out the window he was less than thrilled to add yet another thing to his long renovation list, so I did it myself. Yep… you heard me. I looked at a couple inspiration photos and off I went. Here is a breakdown of all the lumber pieces I used to create this grandiose Craftsman Style focal point window.
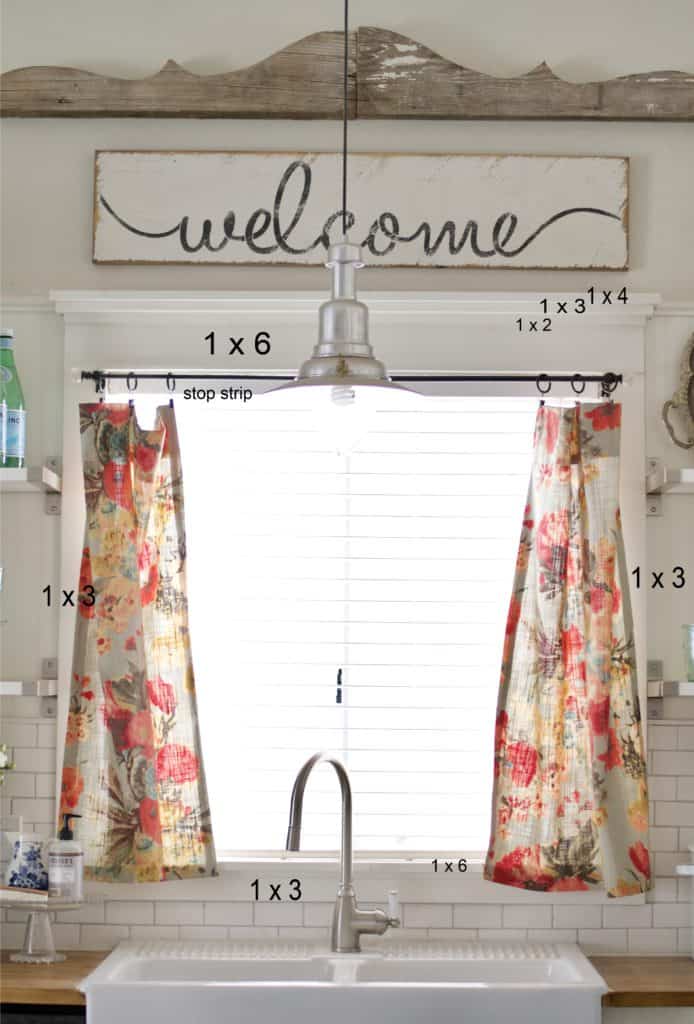
I feel like this graphic is the easiest way to talk about each size wood I used for this project. I love a good easy to read visual aid.
How to Install
I simply applied each piece with our finish nailer, the secret to making this all look custom and great is caulking the edges to seal each piece together before you paint it. It probably took me about an hour start to finish, and years later it’s still one of my favorite projects. When people come into our home they nearly always comment on it… and I chuckle because it was so easy to do. How come its always the simple things that get the most attention it seems?
If you’re wishing you could buy a home filled with character and beautifully trimmed out windows, I assure you… you can add the character yourself simply and for a much smaller price tag than buying a home with it already done. Some people have added metal decorations to theirs by deciding to buy a mild steel square bar from construction suppliers to make it their own. This can add another dimension of character to your style trim and you can save money in the process! The steel bar could be fashioned into a steel trim around the outside of this craftsman trim to create some contrast around the edges of the piece.

